VSCO Recipe: Create, Apply, and Manage Your Edits
Enhance your creative potential with VSCO Recipes. Discover how to effortlessly create, apply, and manage personalized editing styles. Download VSCO Cam APK to access a complete preset library and advanced editing tools. Elevate your editing skills with the vsco recipe and streamline your workflow.
Introducing VSCO Recipe
When we edit our photos, we strive to capture our unique essence and create visual stories that reflect who we are. Using the recipes feature in the VSCO app, achieving consistent and personalized looks has become simpler than ever. Here, you will discover the exciting world of recipes, empowering you to easily recreate your favorite editing styles.
Take advantage of the opportunity to experiment and have fun with your editing style using the Recipes tool. This updated feature allows you to save your preferred edit combinations and recreate looks that feel authentically.
Download VSCO Cam APK
We invite you to download the VSCO Cam APK from our site to take full advantage of the Recipes tool. This download unlocks many benefits, including access to our complete preset library, the latest editing tools, and inspiring educational content. With VSCO Cam APK, you can save up to ten personalized recipes, further expanding your creative possibilities.
How to Create a VSCO Recipe
Step 1: Select an image from your library and tap the Edit icon. Utilize the preset options and the intuitive toolbar to adjust the photo according to your desired look.
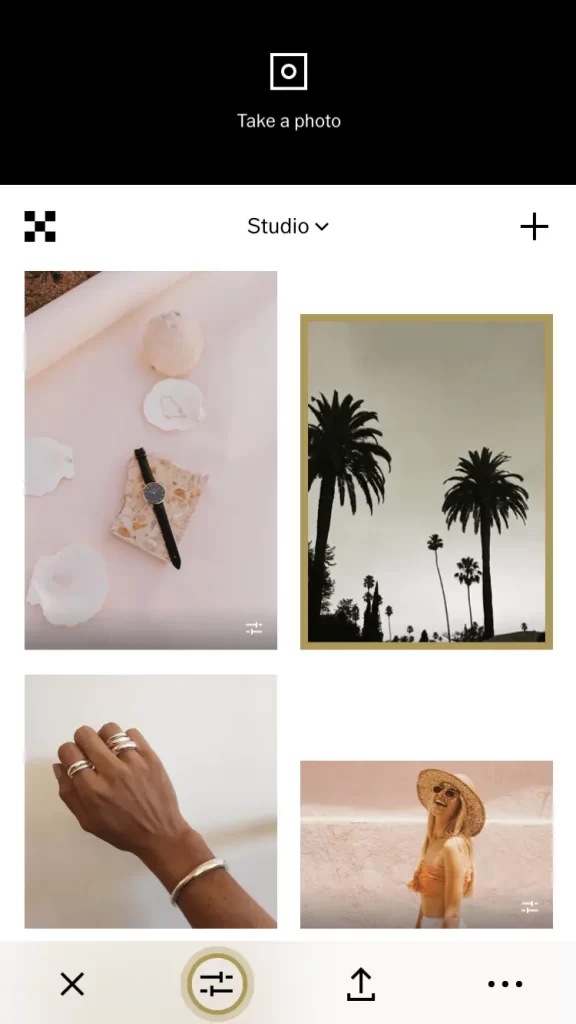

Step 2: You can quickly compare edits while editing your image using the swipe gesture. A simple left swipe lets you compare revisions rapidly, while a right swipe lets you redo the previous revision.

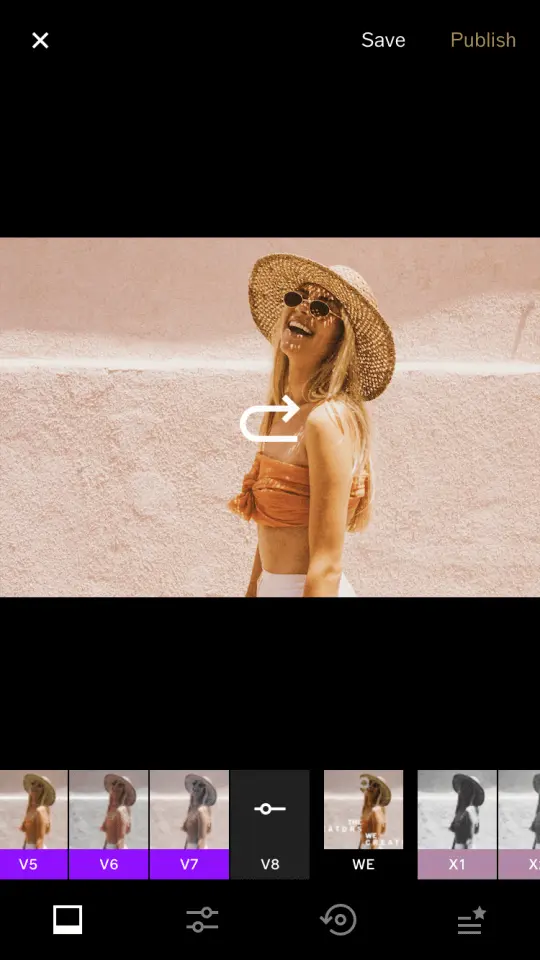
Step 3: Select the edit list icon. You can customize your edits further by tapping on specific tools or presets to remove or adjust them according to your preferences.
To create a new recipe using your current edit list, tap the “+” icon after you have finished your edits. Remember, with the VSCO CAM APK; you can save up to ten personalized recipes, allowing for a vast range of creative variations.
How to Apply a VSCO Recipe
Step 1: Choose an image from your library that you want to enhance. Tap the Edit icon to enter the editing interface.
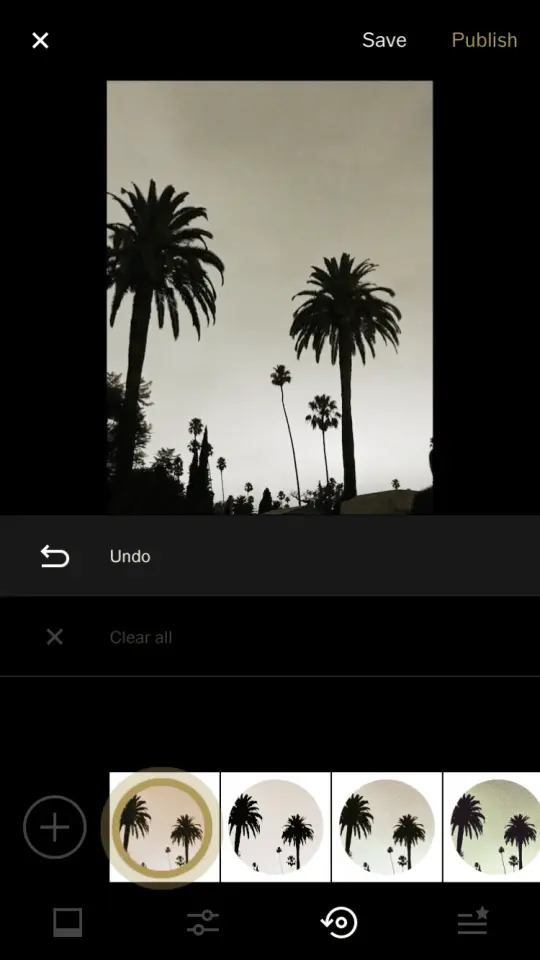
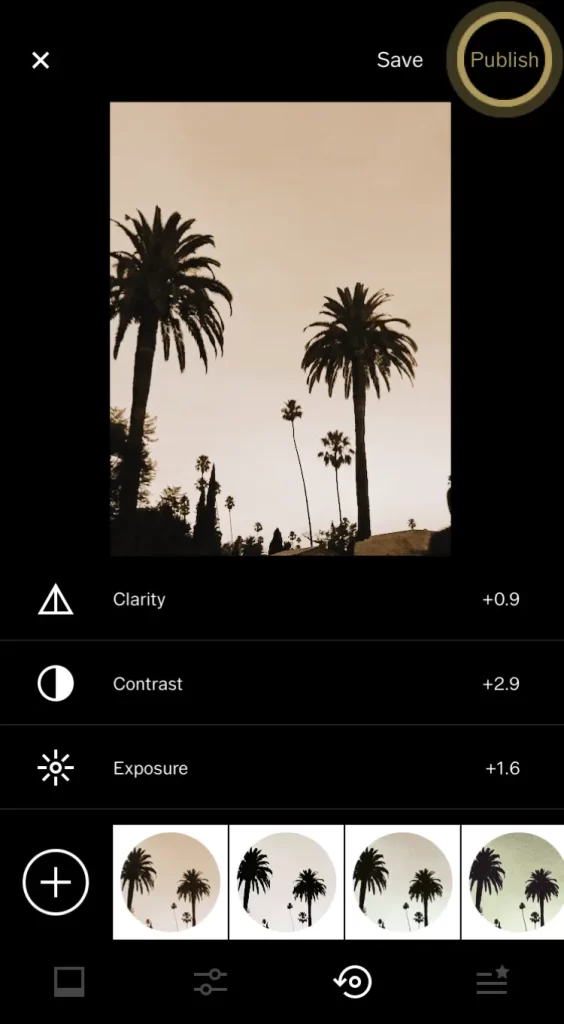
Step 2: Within the editing interface, locate the Edit List icon. Select the recipe you want to apply to your image from the row of thumbnails.
Step 3: As you select the recipe, the corresponding edit list will appear below your photo. Feel free to make additional adjustments to your images if necessary. Finally, choose the Publish option to upload your photo to your VSCO profile, automatically saving your edits.
How to manage your VSCO recipes
Step 1: Take control of your recipes by clicking the Organizer icon.
Step 2: To rearrange the order of your recipes, press and hold the double lines (=) next to each recipe and drag it up or down in the list. If needed, you can delete a recipe by tapping on the icon resembling a minus sign within a circle. Remember to tap Save to preserve your changes.
How to Organize Your Presets, Tools, & Recipes
Organizing presets, tools, and recipes is crucial for a streamlined and efficient editing workflow in the VSCO app. The new preset management view empowers users to favorite, arrange, and hide these elements according to their preferences. This comprehensive guide will walk you through the step-by-step process of organizing your presets, tools, and recipes, ensuring a personalized editing experience that enhances your creative journey.
Access the Preset Management View
To organize your presets, tools, and recipes, open the VSCO app and select a photo from your studio. Tap on the Edit icon to enter the editing interface. This action launches the preset dock, where you can access the Presets and Tools Organizing section.
Organizing Presets
Within the Presets and Tools Organizing section, you will find all your available presets, tools, and recipes. Let’s start by organizing your presets.
- Favorite Presets: To mark a preset as a favorite, tap on the Favorite icon associated with that preset. Favoriting a preset brings it to the forefront of your preset dock, allowing easy access. All favorited presets can be found on the Favorites tab within the Edit view.
- Rearrange Presets: If you wish to change the order of your presets under Favorites, hold down the Arrange icon and drag the preset to your desired position. It is possible to customize the order settings so that you can edit them quickly and conveniently.
- Hide Presets: If you prefer to hide an entire preset section, tap on Hide. Please note that any of your favorite presets won’t be hidden from your preset dock.
Once you have organized your presets, tap Save to preserve your changes.
Organizing Tools and VSCO Recipes
While you can arrange tools and recipes in the same way as presets, hiding these elements is not currently supported. However, you can still manage them effectively.
- Rearrange Tools and Recipes: You can rearrange your tools and recipes similar to presets. Hold the Arrange icon down and drag the tool or recipe to the desired position.
- Deleting Recipes: If you wish to remove a recipe, tap on the remove button associated with that recipe. Tapping cancel will discard your changes.
Remember to tap Save after organizing your tools and recipes to ensure your changes are saved.
How to use VSCO Recipe & History
Recipes and History can enhance your photo and video editing experience. These valuable features within your editing tool allow you to save adjustments and undo edits, offering convenience and efficiency. In this article, we will explore how to leverage Recipes and History to enhance your editing process and achieve consistent and stunning results.
There is an article on how to use VSCO also.
What is VSCO Recipe History
Recipes are a handy feature in your photo and video editor that lets you save a combination of tool and preset adjustments. With Recipes, you can easily apply these saved edits to other images, reducing your time and effort in recreating your preferred look.
How to use Recipe History
- Creating a VSCO Recipe: Start by editing a photo to your liking. Once you are satisfied with the adjustments, tap the recipe icon. You will see a list of currently applied edits. To create a recipe, tap the “+” icon, and a thumbnail of the image with the applied edits will be added to the list.
- Applying a VSCO Recipe: Open another image in the editor and navigate to the vsco recipe tab. Please select the desired vsco recipe by tapping on its thumbnail. Watch as the chosen adjustments are instantly applied to the updated image, allowing for consistent editing across multiple photos.
- Managing VSCO Recipe: To delete a vsco recipe, simply long-press it. If you wish to temporarily disable an edit within the recipe, press and hold on to the respective item in the edit list. Tap or swipe left on an item to adjust or delete it.
The Power of History
- Undo Edits: With the History tool, you can easily undo edits step-by-step. It enables you to revert to a previous state, letting you experiment without losing your progress. Simply tap the Undo option to step backward through your editing history.
- Clear All Edits: The Clear All option resets your image to its default state. This is particularly useful when you want to start fresh or remove all applied adjustments with a single tap.

